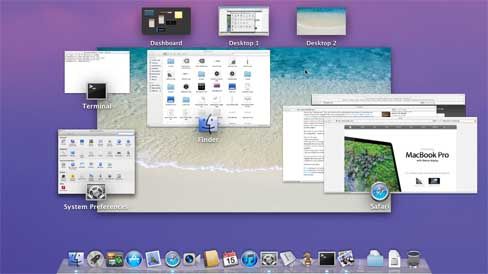
You have probably noticed when you activate Mission Control, in
Mac OS X
Lion, that there is a second background image behind the wallpaper you
may have already chosen for the desktop. The Linen tiled picture is
selected by default for the operating system, but you can change this to
a custom image if you desire to give it your own unique look and feel.
Setting Up Your ImageLion's
processing will not recognize a file that does not have the proper
extension for the file of the picture you will be using. So, in order
for this to work, you will need to either make a new picture in an
application of your choosing, or you can simply copy and paste your
ready image to an app and export the file with the PNG format. To
simplify this process, just follow these steps:
Open the file you want to use as the new Wallpaper (we are using Preview for these directions):
• Go to File, and select Export
• Next, choose the format PNG, and save as "defaultdesktop.png"
If you want to optimize the look of the wallpaper before exporting, you should see if
the
resolution of your display matches that of the file you will be using.
If the file is too long or too wide you could run into problems with how
it displays. The default Linen image is 256 x 256 pixels small square
that is used as a tiled pattern. You can check the resolution of your
monitor by simply launching System Preferences and going to Displays.
Replace the Mission Control Background Picture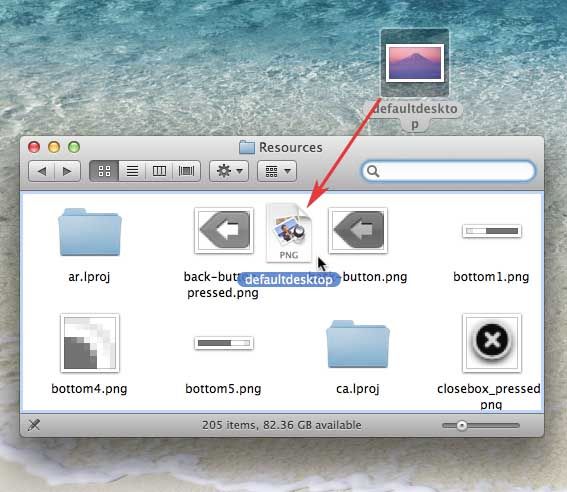
Buried
within the system files, this little file is hidden waiting for you to
change it. You cannot find this particular file by using Spotlight or
the Finder search. Instead, follow these steps to get to it:
• Choose Go from the Finder menu (or hit Command + Shift + G) and type in this location:
/System/Library/CoreServices/Dock.app/Contents/Resources/
•
Look through the folders and files until you see "defaultdesktop.png"
(you can make a copy of this if you want to revert back to this easily
at a later time).
• Select your file you named
"defaultdesktop.png" and move it to this Resources folder. You can do
this the easiest way by dragging the file over the open Finder window. A
window will pop up asking which option you would like to use. Choose
Replace. You may have to enter your User Password to Authenticate this
process.
• Next, launch Terminal from Spotlight and type the following command:
killall Dock
Now,
whenever you use Mission Control by using the assigned F3 key or the
three finger upward swipe or by simply using the icon on the dock, you
will see your chosen beautiful custom picture appear before your eyes.
If
you want to use an existing OS X Lion desktop image as a new Mission
Control background, just as we have here in our example, you can find
these desktop files by selecting "Go" from the Finder menu, and click
"Go to Folder", then type "/Library/Desktop Pictures/". Once here, you
can choose a file to copy. Select it, and go to the Finder menu and
under Edit, hit Copy. Next, paste to the Desktop or wherever you want to
paste. Then open the file in Preview, from there, follow the same
process to export the file in the PNG format. After this has been
accomplished, go once again to the Resources folder and drag the file
over as shown in the preview steps above. Enter your password to
Authenticate if needed. And Presto!
If you would like to go back
to the default setting, you can just replace the file in the Resources
folder with the original backed up Linen image file.


 Want
to have an easy way of