Social Icons

Showing posts with label Hardware. Show all posts

Thursday, 4 October 2012

How to Fix Dell Latitude D610 Restart, Hang Problem

I bought a used Dell D610 laptop a year ago and really like it. Since then I have purchased over 6 of them. Recently one of them started overheating and shutting down. Normally these laptops are a lot of work to get apart, but I figured out a quick 5 minute repair for this problem.

First remove the top cover plate by prying up on the right side and rocking it back and forth to disconnect it.


Next remove the 2 screws that hold down the keyboard. To remove the keyboard unhook the catch that is on each side of it then unplug it from the motherboard.  The second screw is above the F4 key.


Next locate the screws that hold down the processor heat sink and loosen them. They stay attached to the heat sink.


When you remove the heat sink you should be able to see if it is clogged with dust like this one. Remove the dust and then put everything back together.


Be sure to check to see if the cooling fan runs on start up. It usually shuts off until it gets hot then it turns back on again automatically.

Wednesday, 5 September 2012

How to Maintain and Clean CD-ROM

Free computer tip for CD-ROM cleaning


Computer CD-ROM is a sensitive device and it need great care to open and clean it. Normally they work good even having fair amount of dust on their lens but it can stop working when dust on the lens is more then enough. It can create two problems.

- Skipping/ Repeating CDs
- Stop reading
- Taking time in reading CDs

in this case you should make it sure that your CD-ROM need to be cleaned.

Take following steps to open the CD-ROM:

  • Take the CD-ROM out of CPU box
  • Open the try of the CD-ROM and remove the front cover of the try.
  • When try cover is removed you can removed the other cover on which play and eject button are situated.
  • Now open the screw

Almost in the middle of the machine there is a lens you can see it from the bottom of the CD-ROM. There is a small screw which holds the lens you can adjust it to fix the lens. some times this screw is lose and lens cannot perform better. now take tissue paper and very softly clean the lens. Always use blower to clean other parts of CD-ROM. After finishing this job tight the screw and place the cover as it was removed. You will definitely see difference in CD reading

Friday, 31 August 2012

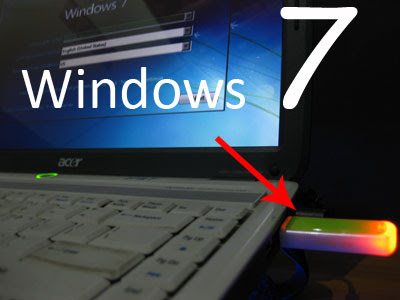
How to Install "Windows 7" From USB Flash Drive, Flash disk, Thumb Drive, Pen drive


Install Windows 7 from USB Flash drive / Flash disk /Thumb drive /Pen drive :

step 1:
Insert your Windows 7 DVD and plug in your USB flash drive.
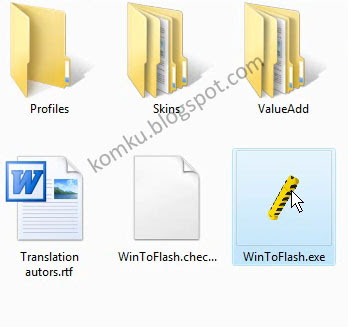
Download newest version of WinToFlash from this link : http://wintoflash.com/download/en/
then open WinToFlash.exe


step 2:
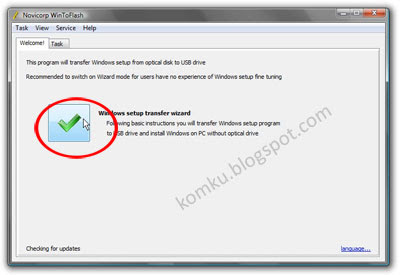
This program will transfer Windows setup from optical to USB drive Recommended to switch on Wizard mode for users have no experience of Windows setup fine tuning

click on green symbol.....

larger image


step 3:
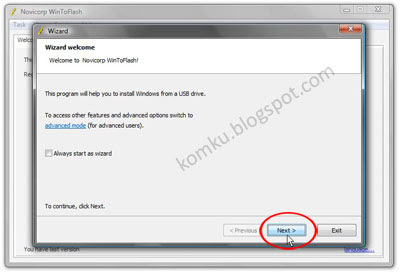
This program will help you to install Windows from a USB drive

click Next button...

larger image


step 4:
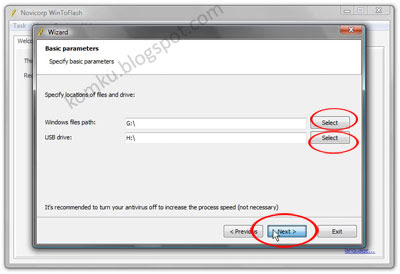
Specify the location of windows setup files and USB drive...
be careful, don't make any mistake...
in my computer, Windows file path: G:\ and USB drive: H:\
it might be different with yours...

then click Next...

larger image


step 5:
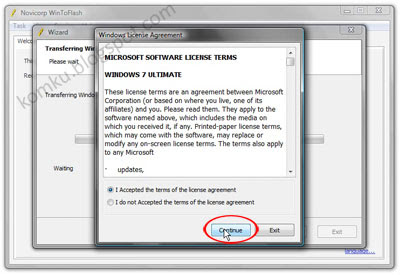
Select: "I Accepted th terms of the license agreement
and click continue...

larger image


step 6:
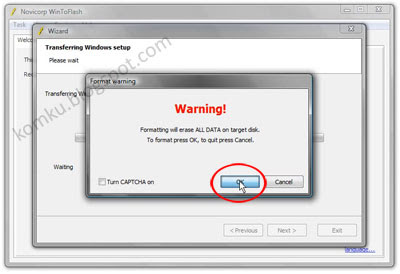
Warning! Formatting will erase ALL DATA on target disk. To format press OK, to quit press Cancel.

click OK....

larger image


step 7:
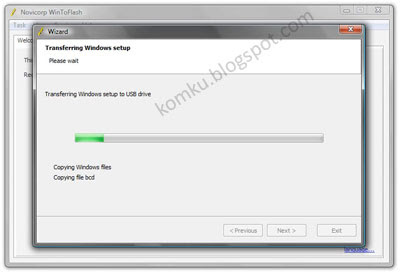
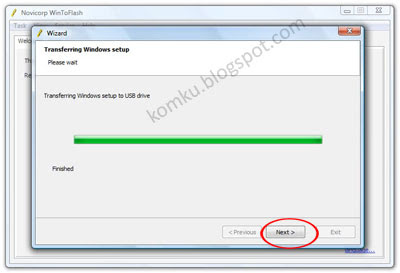
please wait while WinToFlash transferring Windows setup to USB drive...

larger image


step 8:
Click Next....


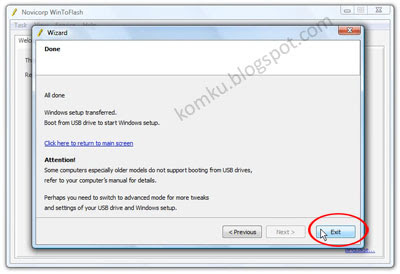
step 9:
done....
click Exit
now you can install Windows 7 on any computer from USB Flash drive...
How? please read step 10....

larger image


step 10:
Plug in your USB flash drive....
then turn on your computer (laptop)
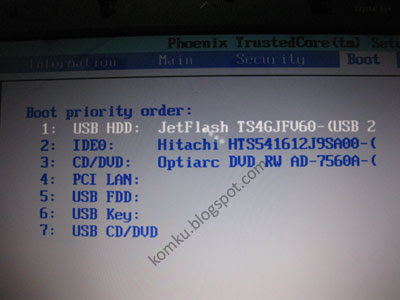
and press F2 key rapidly during the post to get the BIOS menu...
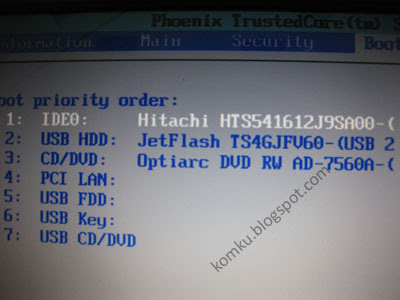
then change Boot priority order: USB flash drive as first boot option
press F10 key to save the configuration and exit....
your computer will reboot...

larger image


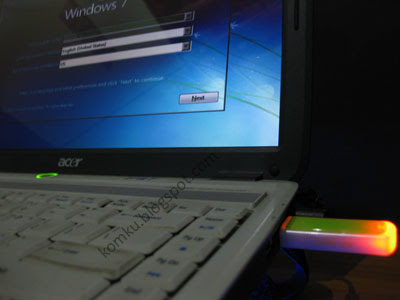
step 11:
then install Windows 7 as usual :)


larger image

on first "restart"
you must go to BIOS again and change boot priority order: HDD as first boot option
then press F10 key to save the configurations and exit....


larger image


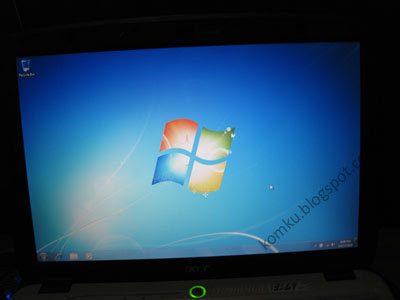
and Windows 7 Insttallation from USB Flash drive finished.....

make-money-468x60