Social Icons

Showing posts with label Services. Show all posts

Thursday, 20 September 2012

How To Windows 7 Security and Maintenance with Action Center

Security and Maintenance are important with any computer, and Windows 7 has made a number of improvements that make it easier than ever to keep your computer in good shape.

In this lesson, you will learn how to use the Action Center, User Account Control Settings, and Troubleshooting to keep your computer running as smoothly as possible. You will also learn how to recover your system settings with System Restore to fix more serious issues.

To Use the Action Center:

If you have any important messages, the flag icon on the taskbar will display a red "X" symbol.
  1. To open the Action Center, click on the small flag icon on the taskbar.
  2. Review the messages.
  3. Click Open Action Center to respond to messages.


To Access the Action Center from the Control Panel:

  1. Click Start.
  2. Go to the Control Panel.
  3. Click Review Your Computer's Status under System and Security.

Fixing problems using the Action Center:

Your messages are displayed in the Action Center pane. Important messages will have a red bar, and less important ones will have a yellow bar. If a security or maintenance issue has a solution, there will be a button on the right side of the message.
Some messages are just notifications and do not indicate a problem with your computer. Those messages will not include a solution button, but they may still have important information or instructions.
  • To fix a problem, click the (solution) button and follow the directions on the screen. When you are done, the message will disappear from the Action Center.   


What is User Account Control?

User Account Control warns you when a program or user is trying to change your computer's settings. It puts a temporary lock on your computer until you confirm that you want to allow the changes. This helps to protect your computer from malicious software. When it was introduced in Windows Vista, many users found that it generated too many disruptive pop-up warnings. Windows 7 now lets the user decide how often they will receive those warnings.

To Change Your User Account Control Settings:

  1. Open the Action Center.
  2. Click Change User Account Control settings.

Use the slider to choose the level of protection you want from User Account Control. It is recommended that you use one of the top two settings. The other two should only be used in special circumstances. It may be best to choose the highest setting and if you end up getting too many pop-ups, you can always lower it to the second setting.


Not all computer problems will be shown in the Action Center. For example, you may be having trouble with aparticular program or device, or with connecting to the internet. For these types of problems, you will want to view the Troubleshooting options.
  • To get there, click Troubleshootingat the bottom of the Action Center pane.


Tuesday, 11 September 2012

What is SQL Server

SQL Server is a relational database management system (RDBMS) from Microsoft that’s designed for the enterprise environment. SQL Server runs on T-SQL (Transact -SQL), a set of programming extensions from Sybase and Microsoft that add several features to standard SQL,

including transaction control, exception and error handling, row processing, and declared variables.

Code named Yukon in development, SQL Server 2005 was released in November 2005. The 2005 product is said to provide enhanced flexibility, scalability, reliability, and security to database applications, and to make them easier to create and deploy, thus reducing the complexity and tedium involved in database management. SQL Server 2005 also includes more administrative support.

The original SQL Server code was developed by Sybase; in the late 1980s, Microsoft, Sybase and Ashton-Tate collaborated to produce the first version of the product, SQL Server 4.2 for OS/2. Subsequently, both Sybase and Microsoft offered SQL Server products. Sybase has since renamed their product Adaptive Server Enterprise.

What can Sql Do.

  • SQL can execute queries against a database
  • SQL can retrieve data from a database
  • SQL can insert records in a database
  • SQL can update records in a database
  • SQL can delete records from a database
  • SQL can create new databases
  • SQL can create new tables in a database
  • SQL can create stored procedures in a database
  • SQL can create views in a database
  • SQL can set permissions on tables, procedures, and views

Sql Select Statement

The select command is the most important for most users. Its purpose is to retrieve data.

select * from table_name
or
select columnlist
from tablelist

Sql Distinct Statement

The SQL DISTINCT command used along with the SELECT keyword retrieves only unique data entries depending on the column list you have specified after it.

select distinct columnlist


from tablelist

Sql where Clause

The WHERE clause is used to extract only those records that fulfill a specified criterion.

select * from table_name

where column_name

or

select * from tablelist

where columnlist

Sql And & OR Operators

The AND operator displays a record if both the first condition and the second condition is true.

SELECT * FROM table_name

WHERE column_name

OR column_name

The OR operator displays a record if either the first condition or the second condition is true.

SELECT * FROM table_name

WHERE column_name

OR column_name

Combine use of AND & OR Operators

You can also combine AND and OR (use parenthesis to form complex expressions).


SELECT * FROM Persons WHERE

column_name

AND (column_name OR column_name)

Sql ORDER BY Keyword

The ORDER BY keyword is used to sort the result-set.


The ORDER BY keyword is used to sort the result-set by a specified column.

The ORDER BY keyword sort the records in ascending order by default.

If you want to sort the records in a descending order, you can use the DESC keyword.

SELECT column_name(s)


FROM table_name

ORDER BY column_name(s) ASC
DESC

Sql INSERT INTO Statement

The INSERT INTO statement is used to insert new records in a table.


There is two form of INSERT INTO statement.

The first form doesn’t specify the column names where the data will be inserted, only their values:-

INSERT INTO table_name

Values (Value 1,Value 2,Value 3,…..)

The second form specifies both the column names and the values to be inserted:-

INSERT INTO table_name

(column1, column2, column3,…)

Values (Value 1,Value 2,Value 3,…..)

Sql UPDATE statement

The UPDATE statement is used to update records in a table.


UPDATE table_name

SET column1=value, column2=value2,…

WHERE some_column=some_value

Sql DELETE Statement

The DELETE statement is used to delete records in a table.


DELETE FROM table_name

WHERE some_column=some_value

Sql ALL Commands

SQL StatementSyntax

AND / OR

SELECT column_name(s)
FROM table_name
WHERE condition
AND|OR condition


ALTER TABLE


ALTER TABLE table_name
ADD column_name datatype

or

ALTER TABLE table_name
DROP COLUMN column_name


AS (alias)


SELECT column_name AS column_alias
FROM table_name

or

SELECT column_name
FROM table_name AS table_alias


BETWEEN


SELECT column_name(s)
FROM table_name
WHERE column_name
BETWEEN value1 AND value2


CREATE DATABASE


CREATE DATABASE database_name
CREATE TABLE


CREATE TABLE table_name
(
column_name1 data_type,
column_name2 data_type,
...
)


CREATE INDEX


CREATE INDEX index_name
ON table_name (column_name)

or

CREATE UNIQUE INDEX index_name
ON table_name (column_name)


CREATE VIEW


CREATE VIEW view_name AS
SELECT column_name(s)
FROM table_name
WHERE condition
DELETE


DELETE FROM table_name
WHERE some_column=some_value

or

DELETE FROM table_name
(Note: Deletes the entire table!!)

DELETE * FROM table_name
(Note: Deletes the entire table!!)


DROP DATABASE


DROP DATABASE database_name


DROP INDEX


DROP INDEX table_name.index_name (SQL Server)
DROP INDEX index_name ON table_name (MS Access)
DROP INDEX index_name (DB2/Oracle)
ALTER TABLE table_name
DROP INDEX index_name (MySQL)


DROP TABLE


DROP TABLE table_name


GROUP BY


SELECT column_name, aggregate_function(column_name)
FROM table_name
WHERE column_name operator value
GROUP BY column_name


HAVING
SELECT column_name, aggregate_function(column_name)
FROM table_name
WHERE column_name operator value
GROUP BY column_name


HAVING aggregate_function(column_name) operator value


IN


SELECT column_name(s)
FROM table_name
WHERE column_name
IN (value1,value2,..)


INSERT INTO


INSERT INTO table_name
VALUES (value1, value2, value3,....)

or

INSERT INTO table_name
(column1, column2, column3,...)
VALUES (value1, value2, value3,....)


INNER JOIN


SELECT column_name(s)
FROM table_name1
INNER JOIN table_name2
ON table_name1.column_name=table_name2.column_name


LEFT JOIN


SELECT column_name(s)
FROM table_name1
LEFT JOIN table_name2
ON table_name1.column_name=table_name2.column_name


RIGHT JOIN


SELECT column_name(s)
FROM table_name1
RIGHT JOIN table_name2
ON table_name1.column_name=table_name2.column_name


FULL JOIN


SELECT column_name(s)
FROM table_name1
FULL JOIN table_name2
ON table_name1.column_name=table_name2.column_name


LIKE


SELECT column_name(s)
FROM table_name
WHERE column_name LIKE pattern


ORDER BY


SELECT column_name(s)
FROM table_name
ORDER BY column_name [ASC|DESC]


SELECT


SELECT column_name(s)
FROM table_name


SELECT *


SELECT *
FROM table_name


SELECT DISTINCT


SELECT DISTINCT column_name(s)
FROM table_name
SELECT INTO


SELECT *
INTO new_table_name [IN externaldatabase]
FROM old_table_name

or

SELECT column_name(s)
INTO new_table_name [IN externaldatabase]
FROM old_table_name


SELECT TOP


SELECT TOP number|percent column_name(s)
FROM table_name


TRUNCATE TABLE


TRUNCATE TABLE table_name


UNION


SELECT column_name(s) FROM table_name1
UNION
SELECT column_name(s) FROM table_name2

UNION ALL


SELECT column_name(s) FROM table_name1
UNION ALL


SELECT column_name(s) FROM table_name2
UPDATEUPDATE table_name
SET column1=value, column2=value,...
WHERE some_column=some_value


WHERE


SELECT column_name(s)
FROM table_name
WHERE column_name operator value

How to Configuring Router via Commands

Configuring the Router

You will be able to learn the basic commands for configuring a router.

sh running-config - details the running configuration file (RAM)

sh startup-config - displays the configuration stored in NVRAM
setup - Will start the the automatic setup; the same as when you first boot the router

config t - use to execute configuration commands from the terminal

config mem - executes configuration commands stored in NVRAM; copies startup-config to running-config

config net - used to retrieve configuration info from a TFTP server

copy running-config startup-config - copies saved config in running config (RAM) to NVRAM or "write memory" for IOS under ver.11

copy startup-config running-config - copies from non-volatile(NVRAM) to current running config (RAM)

boot system flash - tells router which IOS file in flash to boot from

boot system tftp - tells router which IOS file on the tftp server to boot from

boot system rom - tell router to boot from ROM at next boot

copy flash tftp - Copies flash to tftp server

copy tftp flash - Restores flash from tftp server

copy run tftp - Copies the current running-config to tftp server

copy tftp run - Restores the running-config from tftp server

General Commands

Here is a list of the general commands. These are the basic level commands and most commonly used

no shutdown - (enables the interface)

reload - restarts the router

sh ver - Cisco IOS version, uptime of router, how the router started, where system was loaded from, the interfaces the POST found, and the configuration register

sh clock - shows date and time on router

sh history - shows the history of your commands

sh debug - shows all debugging that is currently enabled

no debug all - turns off all debugging

sh users - shows users connected to router

sh protocols - shows which protocols are configured

banner motd # Your customized message here # - Set/change banner

hostname - use to configure the hostname of the router

clear counters - clear interface counters

Privileged Mode commands of a router

Learn how to work in the privileged mode of a router.

enable - get to privileged mode

disable - get to user mode

enable password - sets privileged mode password

enable secret - sets encrypted privileged mode password
Setting Passwords on router

Here you will be able to learn how to set the password on a router.

enable secret - set encrypted password for privileged access

enable password - set password for privileged access (used when
there is no enable secret and when using older software)
Setting the password for console access:

(config)#line console 0

(config-line)#login

(config-line)#password
Set password for virtual terminal (telnet) access (password must be set to access router through telnet):

(config)#line vty 0 4

(config-line)#login

(config-line)#password
Set password for auxiliary (modem) access:

(config)#line aux 0

(config-line)#login

(config-line)#password

Router Processes & Statistics

By these command you can see the statistics and different processes of the router.

sh processes - shows active processes running on router

sh process cpu - shows cpu statistics

sh mem - shows memory statistics

sh flash - describes the flash memory and displays the size of
files and the amount of free flash memory

sh buffers - displays statistics for router buffer pools; shows the size of the Small, Middle, Big, Very Big, Large and Huge Buffers

sh stacks - shows reason for last reboot, monitors the stack use of processes and interrupts routines

IP Commands

Here is a list of the IP Commands

Configure IP on an interface:

int serial 0
ip address 157.89.1.3 255.255.0.0

int eth 0
ip address 2008.1.1.4 255.255.255.0

Other IP Commands:

sh ip route - view ip routing table

ip route [administrative_distance] - configure a static IP route

ip route 0.0.0.0 0.0.0.0 - sets default gateway

ip classless - use with static routing to allow packets destined for unrecognized subnets to use the best possible route

sh arp - view arp cache; shows MAC address of connected routers
ip address 2.2.2.2 255.255.255.0 secondary - configure a 2nd ip address on an interface

sh ip protocol
CDP Commands (Cisco Discovery Protocol uses layer 2 multicast over a SNAP-capable link to send data):

sh cdp neighbor - shows directly connected neighbors

sh cdp int - shows which interfaces are running CDP

sh cdp int eth 0/0 - show CDP info for specific interface

sh cdp entry - shows CDP neighbor detail

cdp timer 120 - change how often CDP info is sent (default cdp timer is 60)

cp holdtime 240 - how long to wait before removing a CDP neighbor (default CDP holdtime is 180)

sh cdp run - shows if CDP turned on

no cdp run - turns off CDP for entire router (global config)

no cdp enable - turns off CDP on specific interface

IPX Commands

Enable IPX on router:

ipx routing
Configure IPX + IPX-RIP on an int:
int ser 0
ipx network 4A

Other Commands:

sh ipx route - shows IPX routing table

sh ipx int e0 - shows ipx address on int

sh ipx servers - shows SAP table

sh ipx traffic - view traffic statistics

debug ipx routing activity - debugs IPS RIP packets

debug ipx sap - debugs SAP packets

Routing Protocols

RIP, IGPR and OSPF are the routing protocols and here is a list of the commands for the working on the routing protocols.

Configure RIP:
router rip
network 157.89.0.0
network 208.1.1.0

Other RIP Commands:
debug ip rip - view RIP debugging info

Configure IGRP:
router IGRP 200
network 157.89.0.0
network 208.1.1.0

Other IGRP Commands:
debug ip igrp events - view IGRP debugging info
debug ip igrp transactions - view IGRP debugging info

Access Lists

Here is a list of the Access list command of a router.

sh ip int ser 0 - use to view which IP access lists are applies to which int

sh ipx int ser 0 - use to view which IPX access lists are applies to which int

sh appletalk int ser 0 - use to view which AppleTalk access lists are applies to which int

View access lists:
sh access-lists

sh ip access-lists

sh ipx access-lists

sh appletalk access-lists

Apply standard IP access list to int eth 0:
access-list 1 deny 200.1.1.0 0.0.0.255
access-list 1 permit any
int eth 0
ip access-group 1 in

Apply Extended IP access list to int eth 0:
access-list 100 deny tcp host 1.1.1.1 host 2.2.2.2 eq 23
access-list 100 deny tcp 3.3.3.0 0.0.0.255 any eq 80
int eth 0
ip access-group 100 out

Apply Standard IPX access list to int eth 0:
access-list 800 deny 7a 8000
access-list 800 permit -1
int eth 0
ipx access-group 800 out

Apply Standard IPX access list to int eth 0:
access-list 900 deny sap any 3378 -1
access-list 900 permit sap any all -1
int eth 0
ipx access-group 900 out

WAN Configurations Commands

Networking over WAN is the main functionality of a router. The most common use of a router is for the WAN connectivity. Here is a list of the commands for the different methods of the WAN connectivity.

PPP Configuration

Point to point protocol is a method for the WAN connectivity and you will find here some commands of PPP.

encapsulation pppppp authentication
ppp chap hostname
ppp pap sent-username
sh int ser 0 - use to view encapsulation on the interface

Frame-Relay Configuration

One of the methods for the WAN connectivity is the Frame Relay. Find here some basic commands for the WAN connectivity through Frame Relay.

encapsulation frame-relay ietf - use IETF when setting up a frame-relay network between a Ciscorouter and a non-Cisco router
frame-relay lmi-type ansi - LMI types are Cisco, ANSI, Q933A; Cisco is the default; LMI type is auto-sensed in IOS v11.2 and up
frame-relay map ip 3.3.3.3 100 broadcast - if inverse ARP won't work, map Other IP to Your DLCI # (local)
keep alive 10 - use to set keep alive

sh int ser 0 - use to show DLCI, LMI, and encapsulation info

sh frame-relay pvc - shows the configured DLCI's; shows PVC traffic stats

sh frame-relay map - shows route mapssh frame-relay lmi - shows LMI info

Miscellaneous Commands

In the last but not least here is a list of the some miscellaneous and useful commands

sh controller t1 - shows status of T1 lines

sh controller serial 1 - use to determine if DCE or DTE device

(config-if)#clock rate 6400 - set clock on DCE (bits per second)

(config-if)#bandwidth 64 - set bandwidth (kilobits)

How to Install and Configure Active Directory On Windows Server

Active Directory is a Center location which contain each information about object and replication,Replication means automatic updation between links and object.

How To Install Active Directory

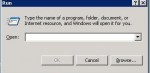
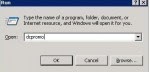
1. Click Start, Go to Run


2. Type dcpromo


3. The wizard windows will appear. Click Next.


4. In the Operating System Compatibility windows read the requirements for the domain’s clients and if you like what you see – press Next.


5. Choose Domain Controller for a new domain and click Next.


6. Choose Create a new Domain in a new forest and click Next.


7. Enter the full DNS name of the new domain, for example – jitu.com then Click Next.


This step might take some time because the computer is searching for the DNS server and checking to see if any naming conflicts exist.

8. Accept the the down-level NetBIOS domain name, in this case it’s jitu. Click Next.


9. Accept the Database and Log file location dialog box (unless you want to change them of course). The location of the files is by default %systemroot%\NTDS, and you should not change it unless you have performance issues in mind. Click Next.


10. Accept the Sysvol folder location dialog box (unless you want to change it of course). The location of the files is by default %systemroot%SYSVOL, and you should not change it unless you have performance issues in mind. This folder must be on an NTFS v5.0 partition. This folder will hold all the GPO and scripts you’ll create, and will be replicated to all other Domain Controllers. Click Next.


11. If your DNS server, zone and/or computer name suffix were not configured correctly you will get the following warning:This means the Dcpromo wizard could not contact the DNS server, or it did contact it but could not find a zone with the name of the future domain. You should check your settings.You have an another option to let Dcpromo do the configuration for you. If you want, Dcpromo can install the DNS service, create the appropriate zone, configure it to accept dynamic updates, and configure the TCP/IP settings for the DNS server IP address.To let Dcpromo do the work for you, select “Install and configure the DNS server…”.
Click Next.


12. If your DNS settings were right, you’ll get a confirmation window.


Just click Next.

13. Accept the Permissions compatible only with Windows 2000 or Windows Server 2003 settings, unless you have legacy apps running on Pre-W2K servers.


14.Enter the Restore Mode administrator’s password. In Windows Server 2003 this password can be later changed via NTDSUTIL. Click Next.


15. Review your settings and if you like what you see – Click Next.


16. See the wizard going through the various stages of installing AD. Whatever you do – NEVER click Cancel!!! You’ll wreck your computer if you do. If you see you made a mistake and want to undo it, you’d better let the wizard finish and then run it again to undo the AD.


17. If all went well you’ll see the final confirmation window. Click Finish.


18. You must reboot in order for the AD to function properly.


How to Install and Configure Microsoft Exchange 2003 on Windows 2003 Domain Control

Exchange 2003 configuration step by step

Configuring your new Exchange 2003 server for internet email with POPcon for downloading the email from POP3 mailboxes isn't hard if you just do it step by step as shown in this configuration sample. In this guide we will step through a sample installation of Exchange 2003 for a company we will call "Mycompany". Mycompany consequently owns the internet domain name "mycompany.com".

Actually it only takes these simple steps:

1.Adding your internet domain name to the recipient policies

2.Configuring the SMTP server for inbound email

3.Adding a SMTP Connector for outbound emails

4.Configuring the email addresses of your users

5.Installing and configuring POPcon, Exchange POP3 Connector

6.(Optional) Check out the ChangeSender Exchange Send-as Outlook Add-in

And this is how to configure the Exchange Server to accept email for a domain like "mycompany.com" and cooperate with POPcon:

First install the Exchange server software from the CD or DVD. You may have to go back to the "Add/remove Software" utility in the control panel to add NNTP support if you did not do so during initial setup of your windows installation. Then open the Exchange System Manager and configure the new Exchange installation.

1. Adding your internet domain name to the recipient policies

Open the Exchange System-Manager. It should look like this:


One of the problems most often encountered when configuring an Exchange 2003 Server system is the fact that often the internet domain name you want to receive email for ("mycompany.com") does not match your standard active directory domain name (i.e.
"servername.mycompany.com"). The Exchange 2003 Server component handling incomming emails - the SMTP server - does not accept emails for other domains than the ones entered in the "recipient policies", even if you entered the correct email addresses ("user@mycompany.com") in the active directory.

To make Exchange accept email for additional domains like your internet domain you need to add the domain names to the default recipient policy like this:

On the main tree panel of the Exchange system manager expand the tree "Recipients" and then click on "Recipient Policies". The policies will be shown on the right panel. Normally only the "Default Policy" will be there:


Open the properties of the "Default Policy" by double-clicking it:


In the Default Policy Properties please choose the tab "E-Mail Addresses". There you will find a list of domains supported by your exchange server. Usually only your internal active directory server domain will be listed here:


Like you can see, after installing our Exchange Server from scratch only our AD domain "Christensen.local" was listed as accepted SMTP address. But emails from the internet will be coming in addressed to "@mycompany.com" and not Christensen.local!


Choose "New..." here to add another accepted inbound domain. Since emails on the internet are sent via the SMTP protocol we want to add an "SMTP Address":


Now enter the domain name you want to receive email for. Please add a leading "@" to the domain name. This is what we entered to support emails addressed to @mycompany.com:


This is how the Default Policy Properties look like after entering the additional SMTP domain:


Enable the newly created entry with a check mark next to it:


When you OK the above dialog, Exchange will ask you with the next dialog box if you want to add the new address to all new users. Usually you do want exactly that to save some typing later.


Please note: You may need to restart your server to activate the new domain!


2. Configuring the SMTP server for inbound email

Next we will configure the SMTP-Server. This is the part of Exchange that accepts incoming emails from POPcon. No special settings are needed to work with POPcon but these are the standard settings in any case:

You will find the settings for the SMTP server under Servers/Protocols/SMTP/Default SMTP Virtual Server. Open the properties by right-clicking on the Default SMTP Virtual Server and choosing "Properties":


The settings on tab "General" can normally be left to the defaults.


On the tab "Access" you can find some configuration settings that might interfere with POPcon.


POPcon only works with a standard SMTP connection WITHOUT authentication, so allow "Anonymous access" in the "Authentication" dialog:


Choose "Connection" to grant or refuse the right to connect to the SMTP server to individual or multiple IP Address Ranges. Please ensure the system that runs POPcon does have the right to connect granted. With this setting ALL systems will have access to your SMTP server:


Under "Relay..." you can assign the right to relay through your SMTP-Server to some systems. This might be needed in some configuration and to be sure you should grant the system POPcon runs on relay rights. All other systems will need to authenticate before accessing the SMTP server to prevent unauthorized users using your system to relay spam:


Under the "Messages" tab you can restrict message size and number of messages accepted for each connection. Please make sure these settings are liberal enough to allow POPcon to transmit large messages to your server.

Also, on this tab you can choose an internal additional recipient for copies of the non-delivery reports. These NDRs will be sent back to senders of mails addressed to recipients unknown in your Exchange Server and they include a copy of the original message sent. You can use these postmaster copies of the NDRs to manually forward emails sent to mistyped recipients to the correct users.


Under tab "Delivery" some more configuration settings for outgoing emails can be found:


3. Adding the SMTP Connector for outbound emails

Now we need to add an SMTP-Connector (vs. SMTP Server) to handle outgoing email to the Internet.

Right-click "Connectors" in the Exchange System Manager and choose "New", "SMTP-Connector" to start adding the new connector and name it appropriately (like "SMTP-Out" in our case):


On the "General" tab you can now choose wether Exchange will send outgoing emails directly to the recipients system ("Use DNS...") or if all emails should be relayes through a SMTP relay server ("smart host").

The first option, DNS, is more direct but can sometimes cause problems when you use a dialup internet connection because some recipient systems will not accept emails that are coming from your ISP's dialup IP range while pretending to come from your real internet domain. Sending via your ISP's smart host / smtp relay server is the better option in this case. We choose our ISPs smtp relay server here.


Also, on this tab you need to add the "local bridgehead" server (as shown above)

On the tab "Address Space" we need to add a wildcard address space for SMTP. We want to allow emails to any domain, so we use the wildcard "*" here:


Side note about the "Cost" entry: If you want to send emails to some domains via a different route you can create multiple SMTP connectors and set the "Cost" entry of this wildcard connector to a higher value while setting the cost entry of the special domain route to a lower cost but with only the special domain allowed on this page. This is especially useful if you generally want to send via DNS and only route to some systems that won't accept your email via some relay server.

If your ISP's SMTP server requires authentication (and almost all of them do today) you can set the username and password on the "Advanced" tab of the SMTP connector. Select "Outbound Security":


Select "Basic authentication" and chose "Modify" to enter the username and password:


And that's already it - Your Exchange is now configured to send email to the internet and receive an SMTP email feed like it will come from POPcon or a direct internet connection. All you should do now is configure your users' email addresses in the Active directory.


4. Configuring your users' email addresses in the Active
Directory

You can set one or multiple email addresses for each user to receive email at. We will step through the necessary actions when creating a new user called John Galt.

First open the active directory and right-click the "Users" item to select "New", "User":


The resulting dialog will allow you to create a new AD user to log into your server and creates an Exchange mailbox all in one wizard pass:


Next...


Now the wizard continues into the Exchange Server realm and lets us create a new exchange mailbox

We just accepted the default alias here. Next...


Ok, fine - but wait: What about our desired email address? john@servolutions.com? We need to add this mail address manually. We are back at the AD configuration console and select the properties of our new user "John Galt" by right-clicking on the name:


Lots of tabs on this resulting dialog:


We go to the "E-mail Addresses" tab:


And surprise: john@servolutions.com is already there, but in suspiciously non-bold print. Actually, Exchange automatically entered this additional email address because we chose so during the editing of the default recipient policies. But we want this address to be the primary address meaning all email sent by John will get this address as the "senders" and "reply" addresses in the mail headers. So we click on "Set As Primary" and are done:


We could also add more email addresses like info@servolutions.com or sales@servolutions.com but only one of these addresses can be the primary address that will be the default senders' address in all emails sent out by John.


And that's really it - just step through your other user's AD entries and set the appropriate primary and additional email addresses.


5. Installing and configuring POPcon or POPcon PRO

After going through the above 4 steps your Exchange is configured to send out email but it still can't pull down email from POP3 or IMAP mailboxes on your provider server. For this you need to install and configure POPcon.

Configuring POPcon is quite straightforward. You need to follow these steps:

a) Configure a Postmaster email address on the GENERAL configuration tab.

b) Add one or more POP3 mailboxes on the POP3/IMAP tab.

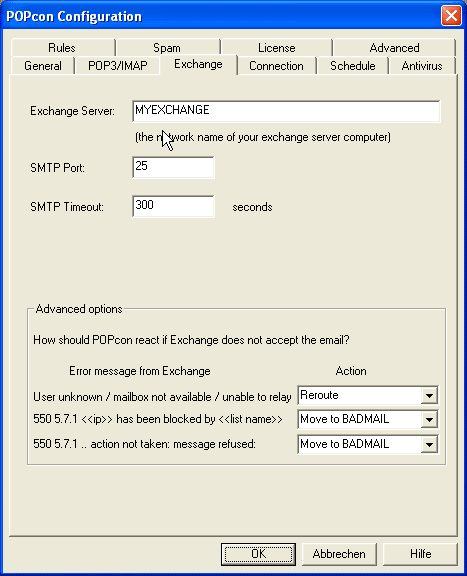
c) Configure the Exchange server name on the EXCHANGE configuration tab.


Download and run the self-extracting installer of POPcon or POPcon PRO and follow the instructions during the installation. It will install the POPcon Administrator program and the POPcon service that runs in the background on your system.

Run POPcon Adminstrator from Start > Programs > POPcon


POPcon Screenshot

Click on "Configure" to open up the POPcon configuration screen.

a) Configure a Postmaster email address on the GENERAL configuration tab.


On this first configuration page you only need to enter the email address of your Postmaster or Administrator user. The Postmaster will receive all emails without a valid recipient as well as general POPcon status notifications. It is very important to define a real email address from inside your exchange server here because mails can be lost irretrievably if POPcon forwards some mail with no recipient information to the postmaster and that account does not exist in your exchange server.

You can leave the log file options to their default settings for now.

Next go to the POP3/IMAP tab to configure the POP3 or IMAP mailbox accounts you want POPcon to download email from.

b) Add one or more POP3 mailboxes on the POP3/IMAP tab.


POPcon PRO collects mail from as many POP3 accounts you like. Just click on Add to add another POP3 host or account to the list of Polled POP3 Hosts. For each server or account you need to fill in the POP3 server settings as shown below.

If you are using catch-all style mailboxes (mailboxes that receive email for a whole domain, regardless of the recipient part before the "@") POPcon needs to filter recipients from incoming mail so only the recipients at your own internet domain are accepted. Please add the domain you consider your own in the "Accepted Recipient Domains" box. This is the same domain you configured earlier in the Exchange Default Policy.

Individual accounts settings


This dialog lets you input the specifics about a POP3 or an IMAP server you want to have polled by POPcon PRO.

This is the information POPcon PRO needs to know about each server:

Server type:

Here you can select on the four supported server types:

POP3: Default. POP3 servers are by far the most common mail
server types on the internet.

POP3-SSL: Some POP3 Servers need SSL encryption enabled for the
connection in order to protect passwords and sensitive information.
Choose this type to have a SSL-encrypted connection to a POP3 server.

IMAP: IMAP Servers are also quite common and theoretically allow the
client to manipulate email folders and move email between folders online.
In our case the protocol is used to download email from the INBOX of the
IMAP server to your exchange server.

IMAP-SSL: Supports SSL connections to IMAP servers for added
protection.


Access:

Configure the server name, account name and password to connect to the mail server
here.

Servername: The name the server you want to have polled.
You can also enter the IP address directly.

Username: The username needed to log into your POP3 or IMAP
mail server.

Password: The password needed to log into your mail server.

IP portnumber: Almost always the TCP/IP port for POP3 mail is 110.
Under some circumstances, internet routers or firewalls change the
port number. Please ask your network administrator or internet provider.
The standard port for POP3-SSL is 995, for IMAP it is 143 and for
IMAP-SSL this should be set to 993.

Timeout: Leave this to the default value.

Please ask your POP3 mailbox hosting provider if you do not have
the above information.

Type of mailbox / distribution:

POPcon PRO supports both catch-all and single user mailboxes

Catch-all mailbox ("*@domainname.com"): For this type of mailbox,
POPcon PRO will distribute the emails retrieved from this server
according to what it finds in the TO:, CC:, BCC: and other header-fields
of the mail. If you choose this option,don’t forget to add your internet
domain name(s) to the "Accepted Recipient Domains" box on the
POP3/IMAP configuration dialog

Single user mailbox ("user@domainname.com"): This type of mailbox
receives email for only one specific Exchange mailbox. You need to
specify the receiver of the email here. POPcon PRO will then direct
all mail retrieved from this server to the recipient email address given here.


Delete / Keep email on the server:

This block allows you to configure POPcon PRO to either delete email after
downloading or keep it on your POP3 or IMAP server for a specified amount
of time or indefinitely.

Delete downloaded email: This is the default setting – POPcon PRO will
delete the Email on your POP3 or IMAP server after successfully
downloading it.

Leave a copy of downloaded email (indefinitely): This option will cause
POPcon PRO to leave a copy of the email on the server. Only use this
option during testing or when you are sure the mail will be deleted
eventually,i.e. by another system periodically downloading and deleting
email.

Leave a copy of downloaded email for n number of days: Causes POPcon
PRO to leave a copy of the email on the POP3/IMAP server for the
specified number of days before deleting it. You can use this option to allow
access to a single POP3 or IMAP mailbox by two different systems.

c) Configure the Exchange server name on the EXCHANGE
configuration tab.


On this configuration screen you can specify the Exchange™-(SMTP) Server you want the mail to be directed to. Normally this will be the computer name of your Exchange™ server (like "MYSERVER").

You can leave all other settings default

These three steps to configure POPcon will provide you with a working set-up. Test it out by confirming the new configuration with OK and then use the "Trigger mail retrieval" button on the POPcon Administrator main screen to start the first mail download. You can follow what is happening in the scrolling log display on that screen. Watch out for any error messages there. There is also a POPcon log file (c:\program files\POPcon\POPconSrv.log – open with notepad) that you can view at your leisure.

6. Check out the ChangeSender Outlook Add-in

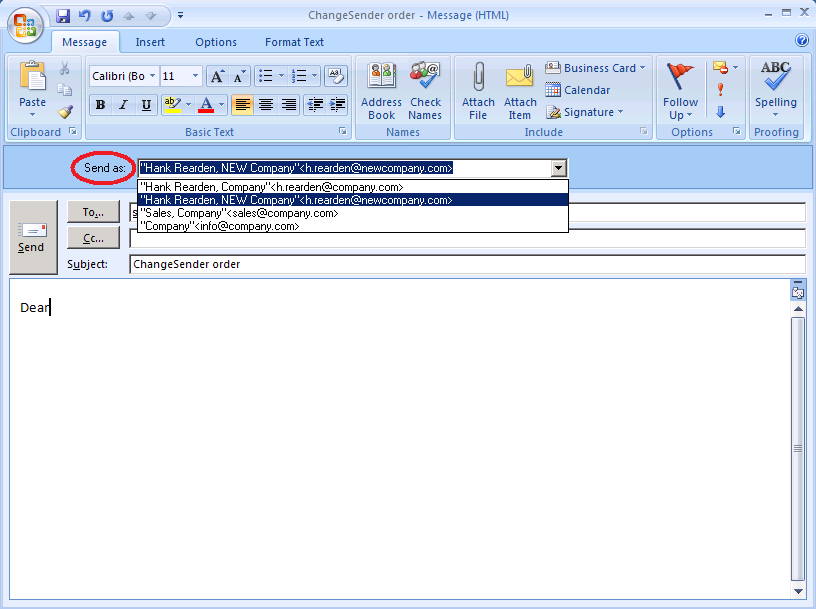
ChangeSender Exchange Send-as Add-in adds one important piece of functionality to Microsoft Outlook when used with Exchange Server: It allows you to send as any of your email addresses and even group addresses or those of other users if allowed by the administrator. Effectively this is the Exchange Send-as function without the limitations of the ActiveDirectory

Without the ChangeSender Exchange send-as component, Exchange always sends out emails on your default email address fixed in the ActiveDirectory even when answering emails received on one of your additional email addresses. Also, Exchange does not allow sharing the same email address (i.e. department-wide or company-wide email addresses) between users. ChangeSender solves both problems by adding a configurable "send as" selection box to your Outlook email form.

ChangeSender Features

  • Automatically selects the right send-as address when replying to emails. ChangeSender uses the address of the original email as sender address for replies.

  • Easy selection of send as addresses for new emails via a new sender address selection box in Outlook.

  • Multiple users can send from the same sender address (i.e. send as sales@yourcompany.com or support@yourcompany.com)

  • Sender appearance fully configurable as "Any name" for each individual email address.Does not show up as "sent on behalf of...".

  • Very simple installation and administration.

  • Administrator can restrict or allow user choices for the sender address and prevent users from sending as other users.

  • Works with Exchange 2010, 2007, 2003, 2000 and with Outlook 2010, 2007, 2003, 2002, 2000 versions.


ChangeSender in Outlook 2007 screenshot

Downloads

Download the free 30-day trial version of ChangeSender and test the full product without
any restrictions until you are sure it meets all your requirements. Then just order license
codes to remove the 30 day limit without re-installing.

ChangeSender consists of two separate components: A server component to be installed
on the Exchange server and a Microsoft Outlook add-in component that is needed for each
client. The Outlook add-in does not work without the server component installed as well.

Server component:

Download Exchange Send-as server component, Exchange 2000, 2003 version
Install this on the Exchange Server (this version for Exchange 2000 or 2003)

Download Exchange Send-as server component, Exchange 2007, 2010 version
Install this on the Exchange Server (this version for Exchange 2007 or 2010)

Client component / Outlook add-in:

Download Exchange Send-as Outlook add-in Install this on each user's system.

You can license ChangeSender Exchange Send-as online and will receive the license
codes by email in just minutes.
make-money-468x60